This tutorial will explain how to correctly use the Work Position / Measure Height feature with a movable sensor using PlanetCNC TNG software and PlanetCNC motion controllers.
Movable Sensor
A movable sensor is basically a switch that sends a signal to the motion controller corresponding input pin. The software will then calculate the Z-axis work position zero value, which is usually on the top of the material surface (tooltip just touching the material surface).
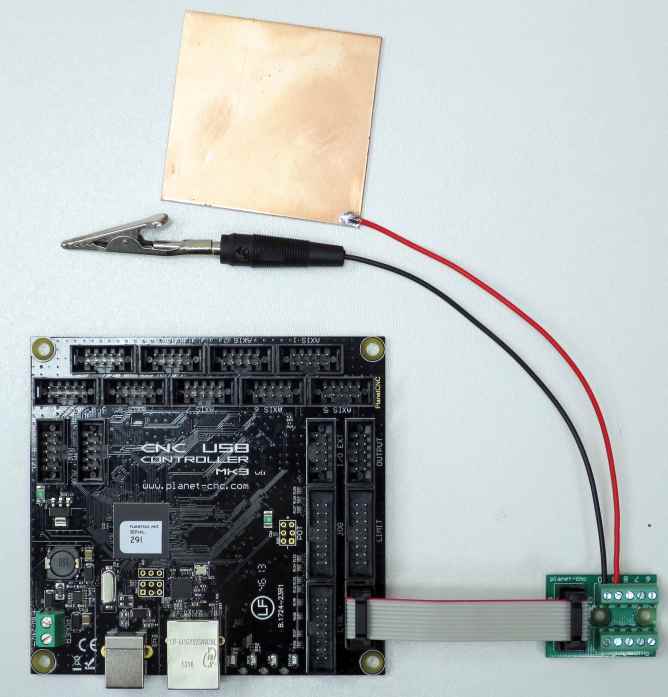
The most basic type of movable sensor is usually copper-clad laminate. Clad has soldered wire that is connected to controller sensor input, while GND signal is attached to the tool via e.g. crocodile clip. But other switch hardware can be used too (lever switch etc… ), you just need to configure it correctly in settings.
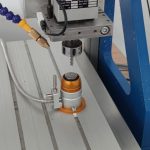
Example of movable sensor used with Mk3 controller:
Configuring movable sensor in PlanetCNC TNG software
In PlanetCNC TNG under File/Settings/Program Options/Probe & Measure configure the input pin that you intend to use for the movable tool sensor.
You can select between either Probe 1 or Probe 2 option. It doesn’t matter which one you choose.
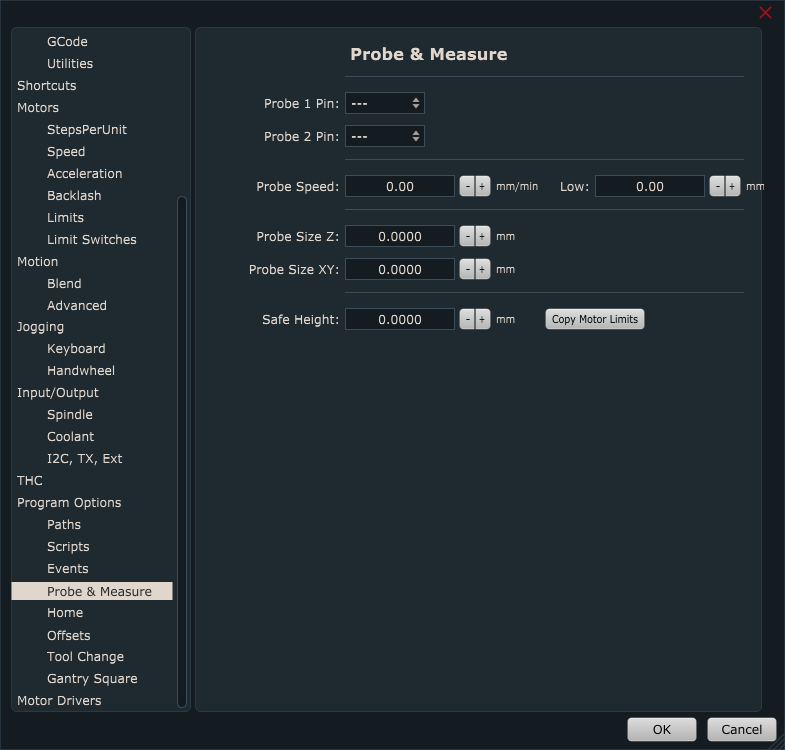
The input pin is selected from the drop-down menu:

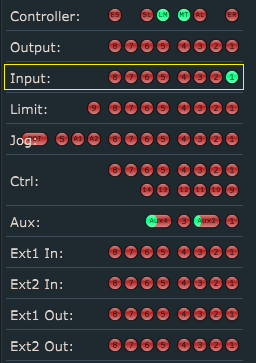
Now that your sensor is connected and its input configured, it is best to activate the sensor by hand to check if everything is functioning OK. Jog your machine (it can be in any direction) and see if the machine stops when you activate the sensor. Please note, that sensor dedicated input LED will be ON only when input is activated. If you use a normally closed switch for your movable sensor, make sure that you invert its input under File/Settings/Input&Output.
Under IO tab of main display check if the input is activated correctly:
Under File/Settings/Program Options/Offsets/Work Position/Measure Height, configure movable sensor parameters:
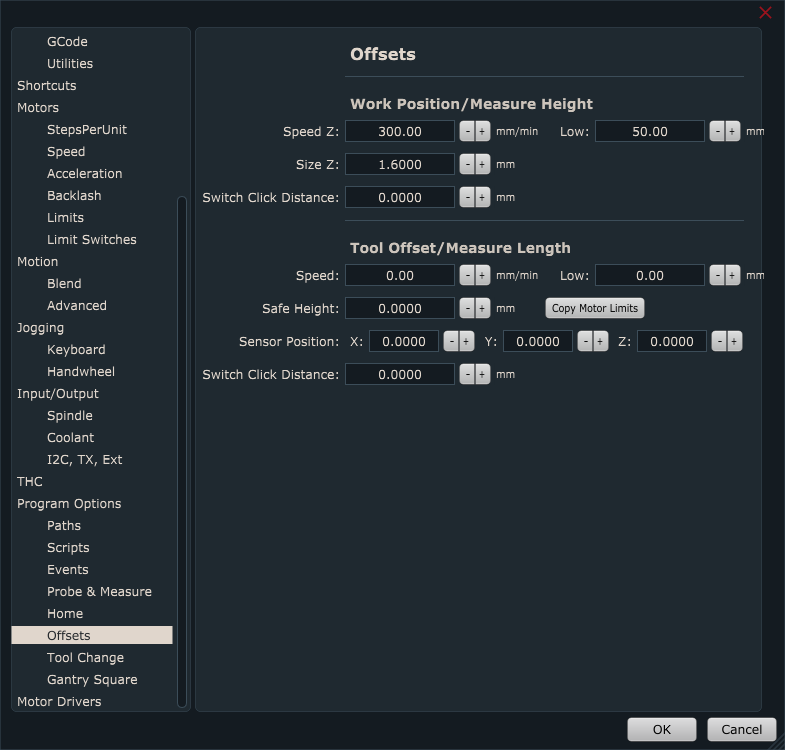
Speed & Low:
Speed and Low are speed values of first and second work position measurement moves (only Z-axis).
The first measurement move will be performed at Speed value. After the movable sensor is activated, the machine retracts for the switch click distance and starts with the second measurement move, but this time at a Low-speed value. Make sure that the Speed value is not set too high to the point where movable tool sensor, tool, or machine could get damaged. The low value should be significantly lower than the Speed value.
Size Z: If you use the copper board as a movable sensor, then the value of this parameter is the thickness of the copper board( usually 1.6mm).
Switch Click Distance: This is the distance from the point where the movable tool sensor is activated and to the point when it is deactivated. For movable sensors, this is usually zero. But you can use some small value, in order for that software performs a second measurement move.
Please note: Make sure that the Speed value is not set too high. You see, during the measuring procedure, when the tool touches the surface (the sensor gets activated) machine stops immediately. If your speed is too high, inertia on Z-axis may cause loss of steps of the Z-axis stepper motor.
Work Position/Measure Height with PlanetCNC TNG software
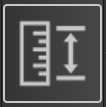
Work position measure procedure can be executed via menu item Machine/Work Position/Measure Height or using left toolbar button:
Default sequence of Work Position/Measure Height procedure:
-Machine will start descending at its current position in the -Z direction using the Speed value.
-When the sensor is activated, the machine will stop and ascend to Z height from which we started the Measure Height procedure.
-Software will set a new work position offset value
-Z-axis work position value on the surface of the material should now be 0(zero).
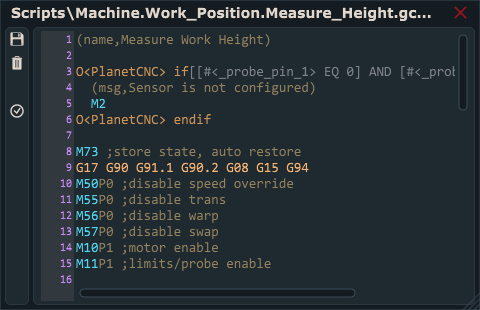
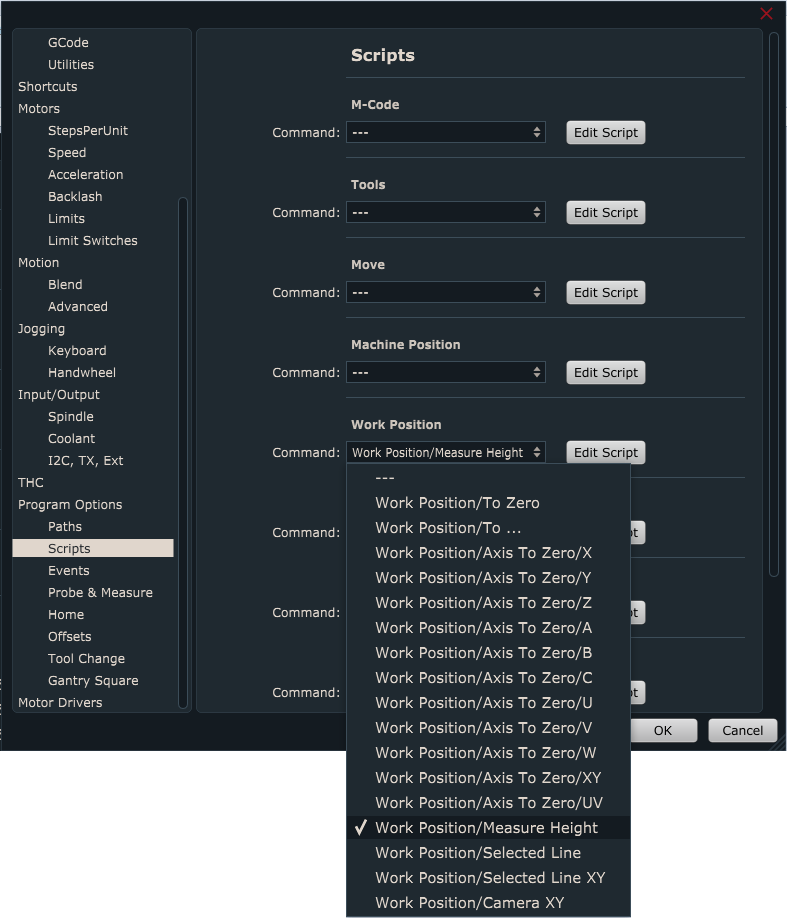
Work Position/Measure Height script file
If you would like to edit script code or have a more in-depth look at the procedure itself, you can do that by an opening the script file.
You can access and edit script files in settings under File/Settings/Program Options/Scripts/Work Position/Measure Height and click the button Edit Script.
The script file will open in TNG gcode editor. In order the Work Position/Measure Height script file is generated and saved in your profiles Script folder, you need to click the Save button.